Turn your product pages into engaging video experiences
Videopop allows you to offer your visitors the opportunity to view videos with which they can interact through call-to-actions. With Videopop, you can design, personalize, broadcast, and analyze your videos in order to capture the attention of your visitors and boost your conversions.
This guide takes you step by step to create your first interactive and shoppable video in less than 10 minutes.
1 ️ ※ Set up your site
Enrollment
- See you on app.videopop.io/signup
- Create your account
- By choosing a username, email and password
- By using Google Connect (you will then be asked for permissions). Validate them.)
Domain name registration
Enter the domain where you want to stream Videopops.
Inserting the Videopop script
Videopop creates a custom script that must be inserted on your site.
Place the script just before the closing tag</head>
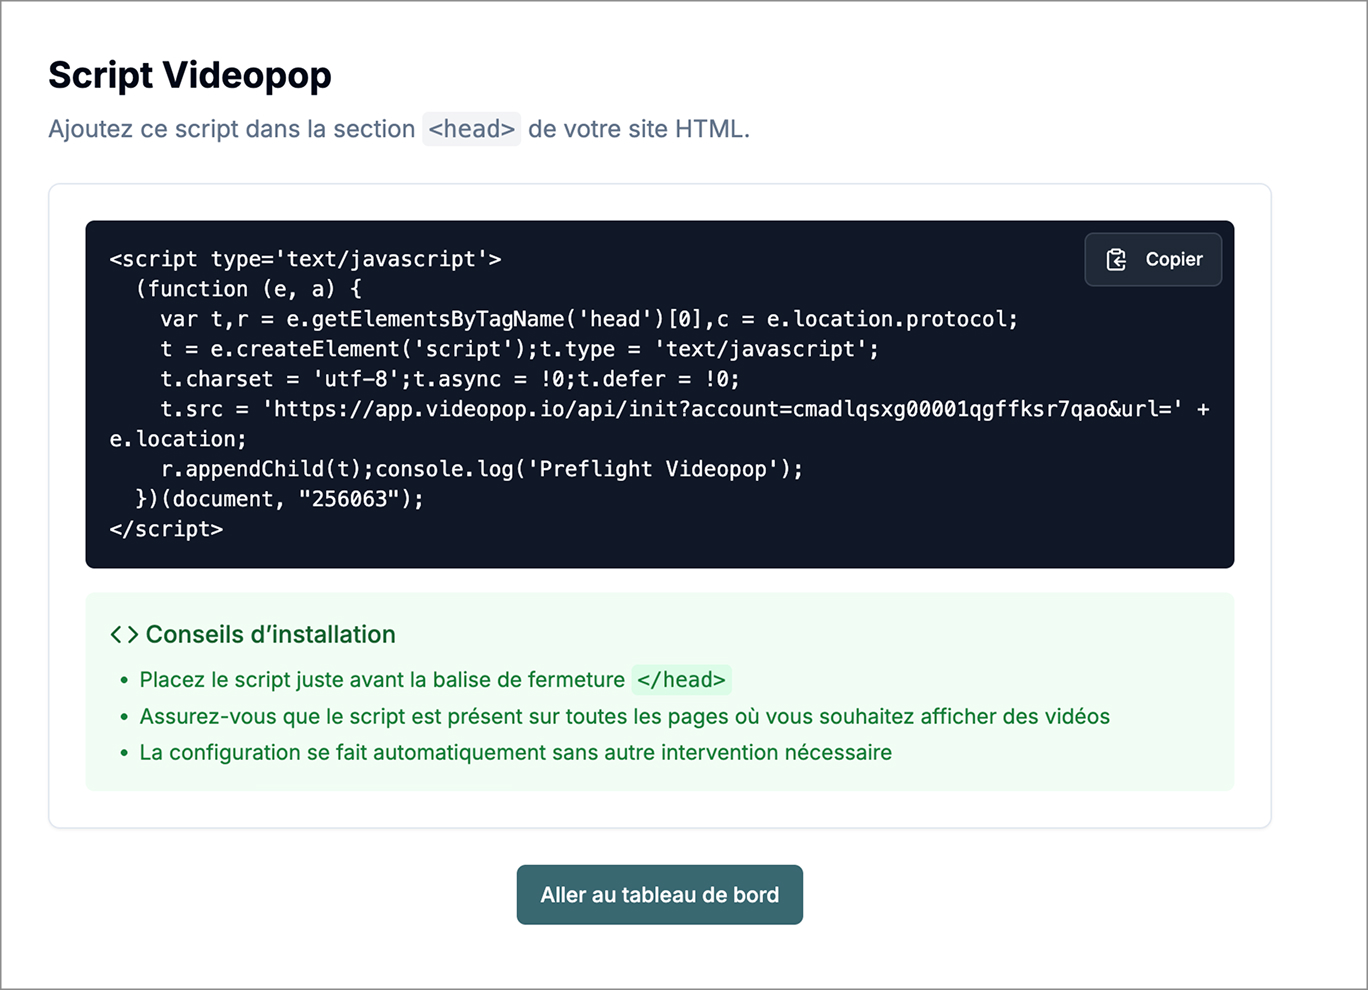
Make sure the script is present on all pages where you want to show videos.
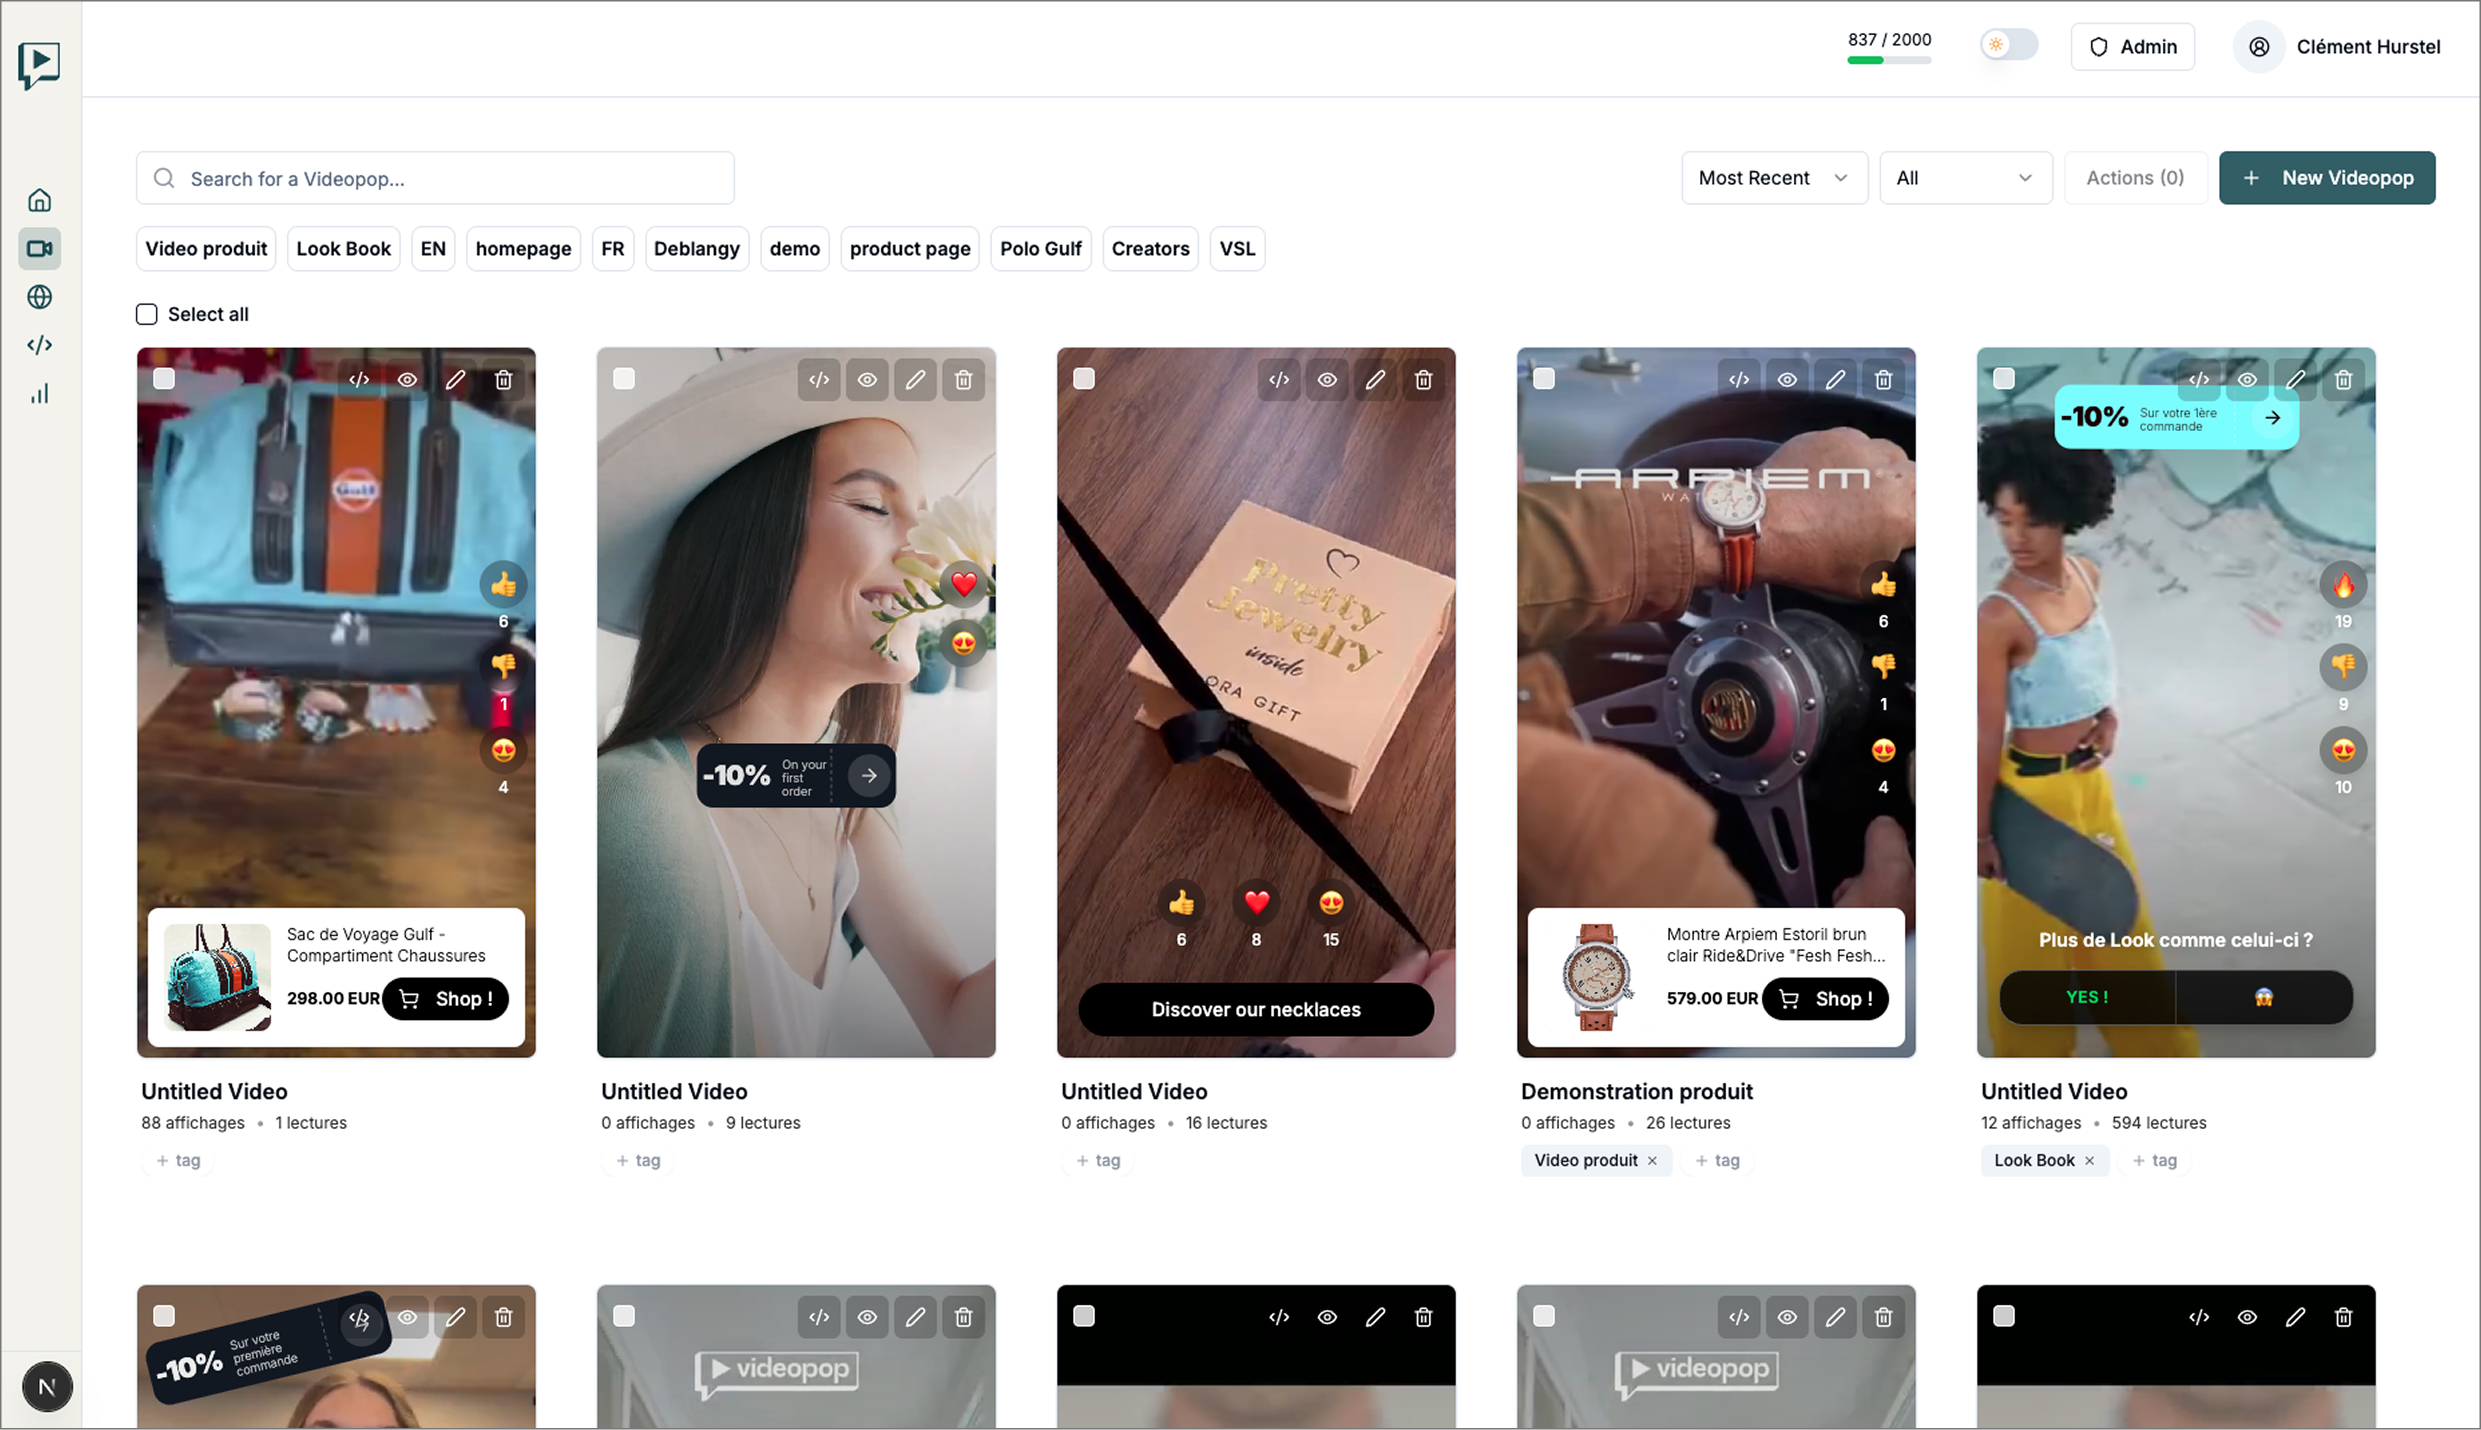
The first time you log in, you will access the section Videopops where you can create and manage and customize your Videopops.
2 ️ ※ Creation of a Videopop
Importing a video
- Click on “+ New Videopop” at the top right.
This gives you access to the Videopop canvas.
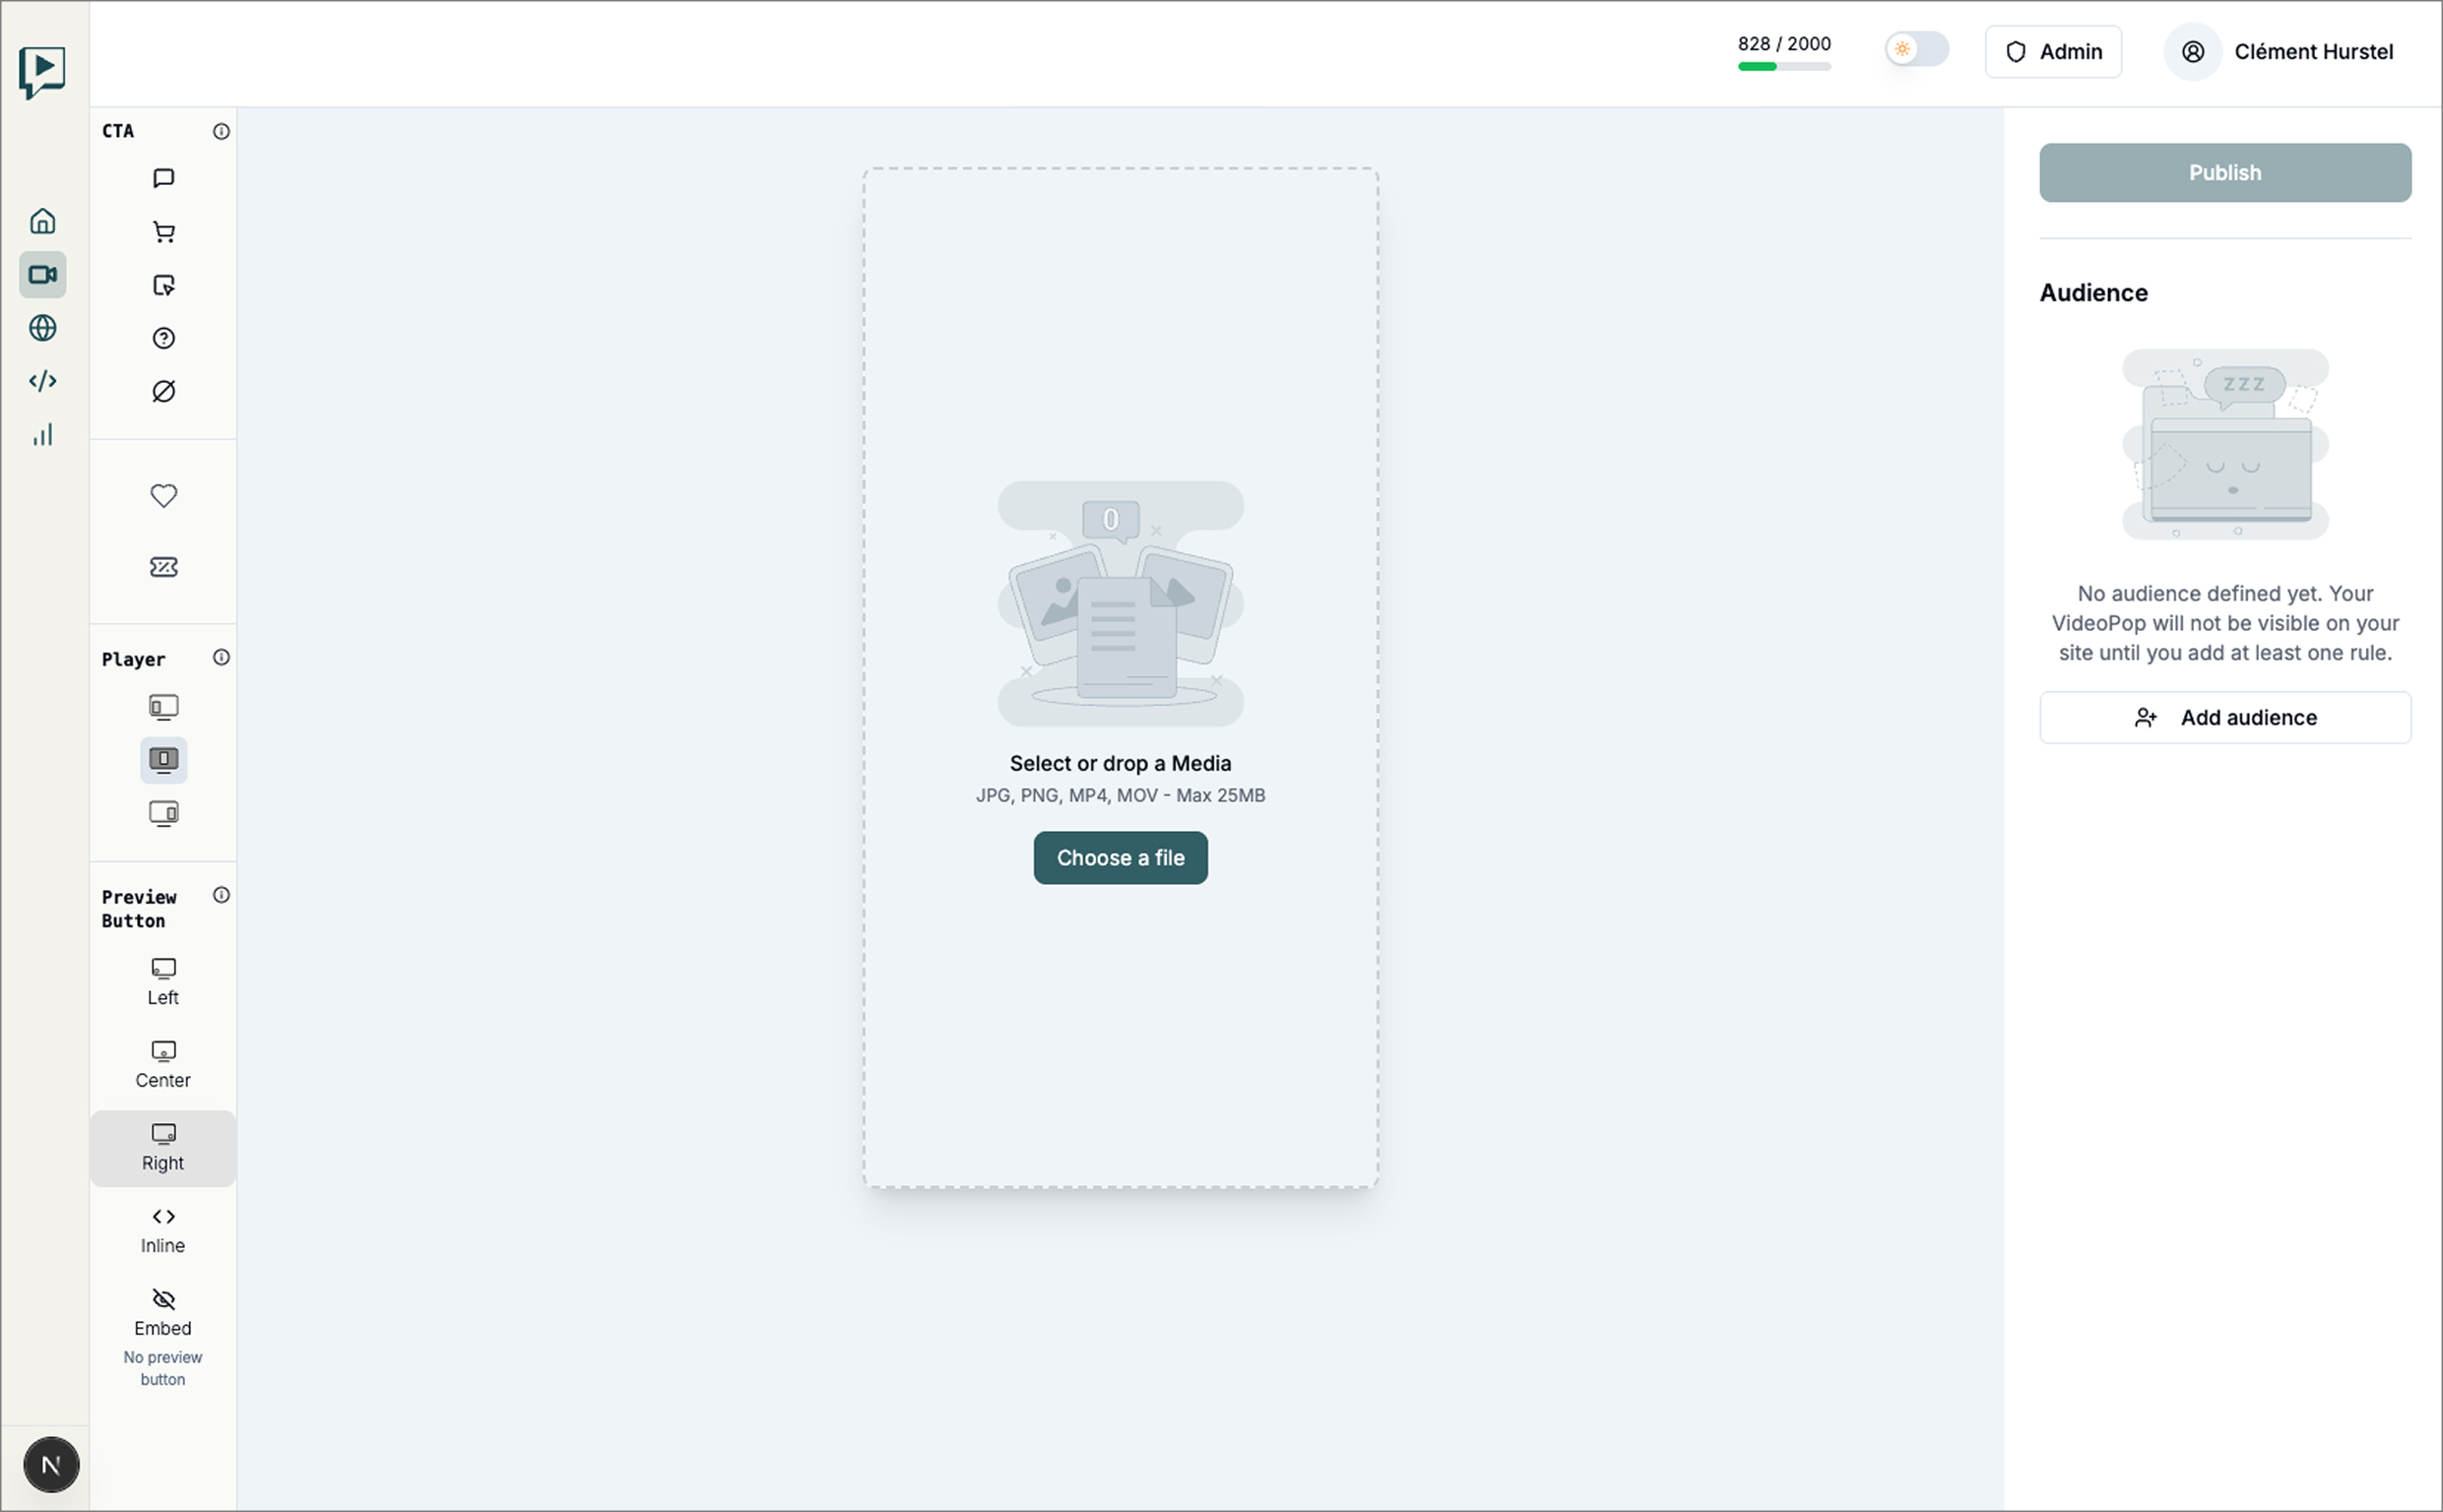
- Click on the center button under “Select or Drop Media”
- Drag and drop your video or click to browse
- Accepted formats: MP4, MOV, AVI
- Max size: 100 MB
- Recommended time: 15-30 seconds
No videos? No problems.
Follow our guide to easily create your videos
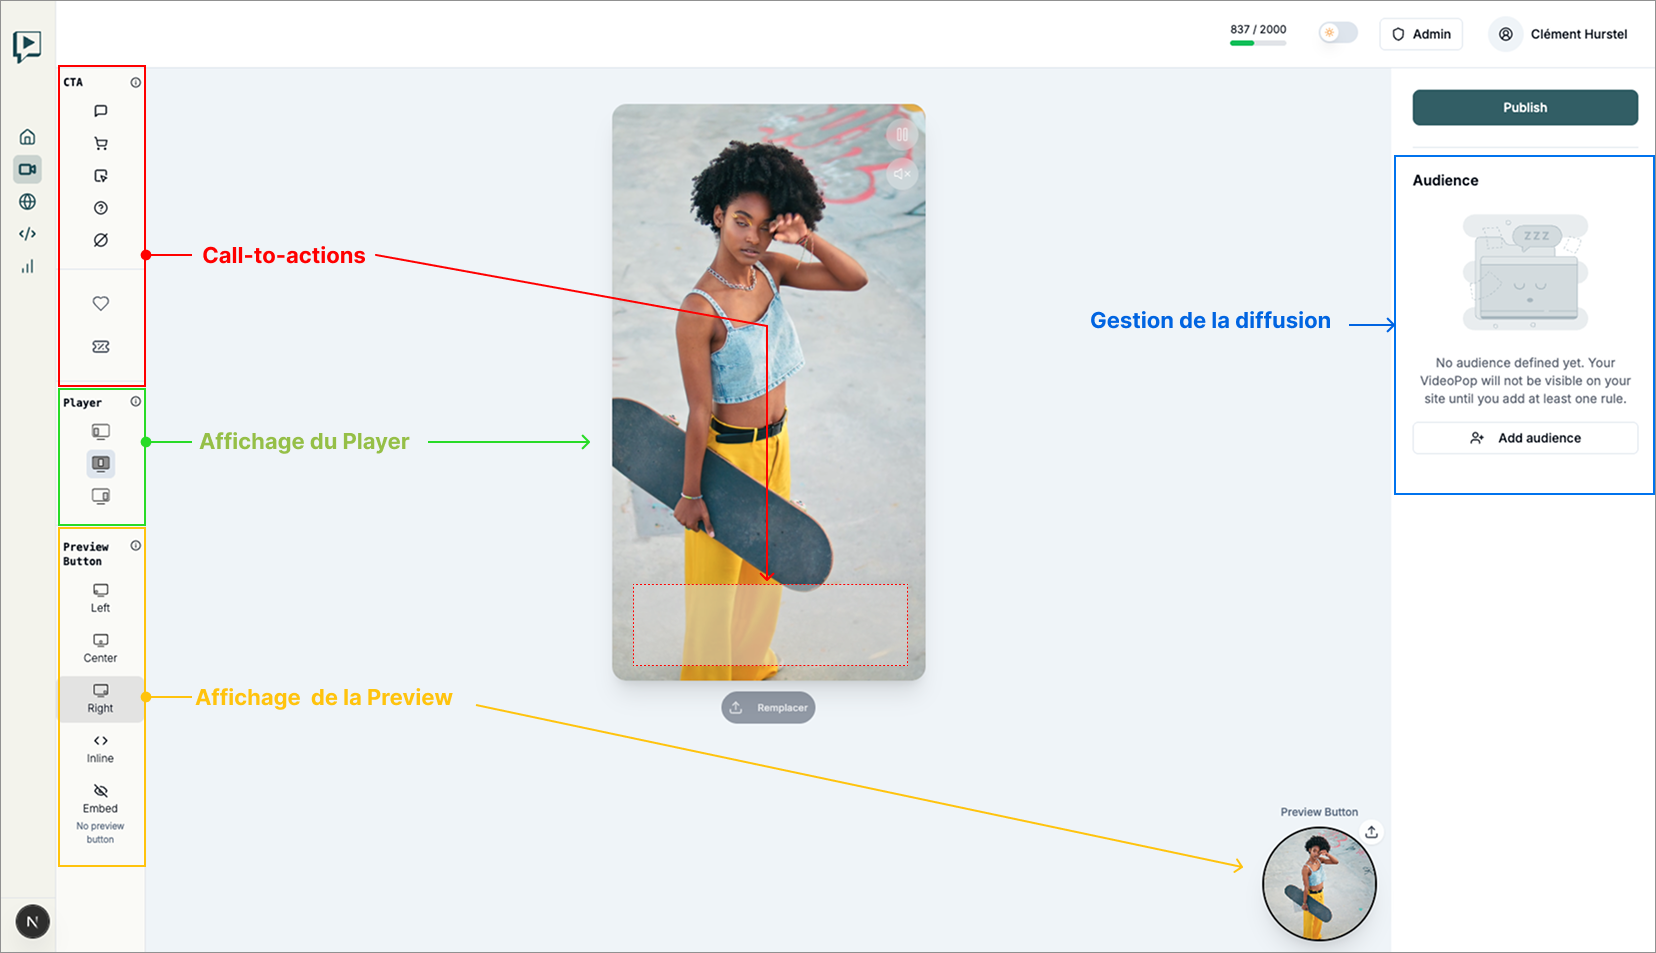
3 ️ 803 Understand the Videopop canvas
The Canva Videopop is the place where you customize your Videopops.
It has 5 zones:
- a central area where you can see your Videopop. It consists of Player And of her Preview
- A toolbox Call-to-actions that allow you to define the CTAs you want to add to your Video
- a toolbox to manage thedisplaying your Player
- another toolbox for manage the preview display
- one broadcast configurator which allows you to define which visitors will be able to see your Videopop.
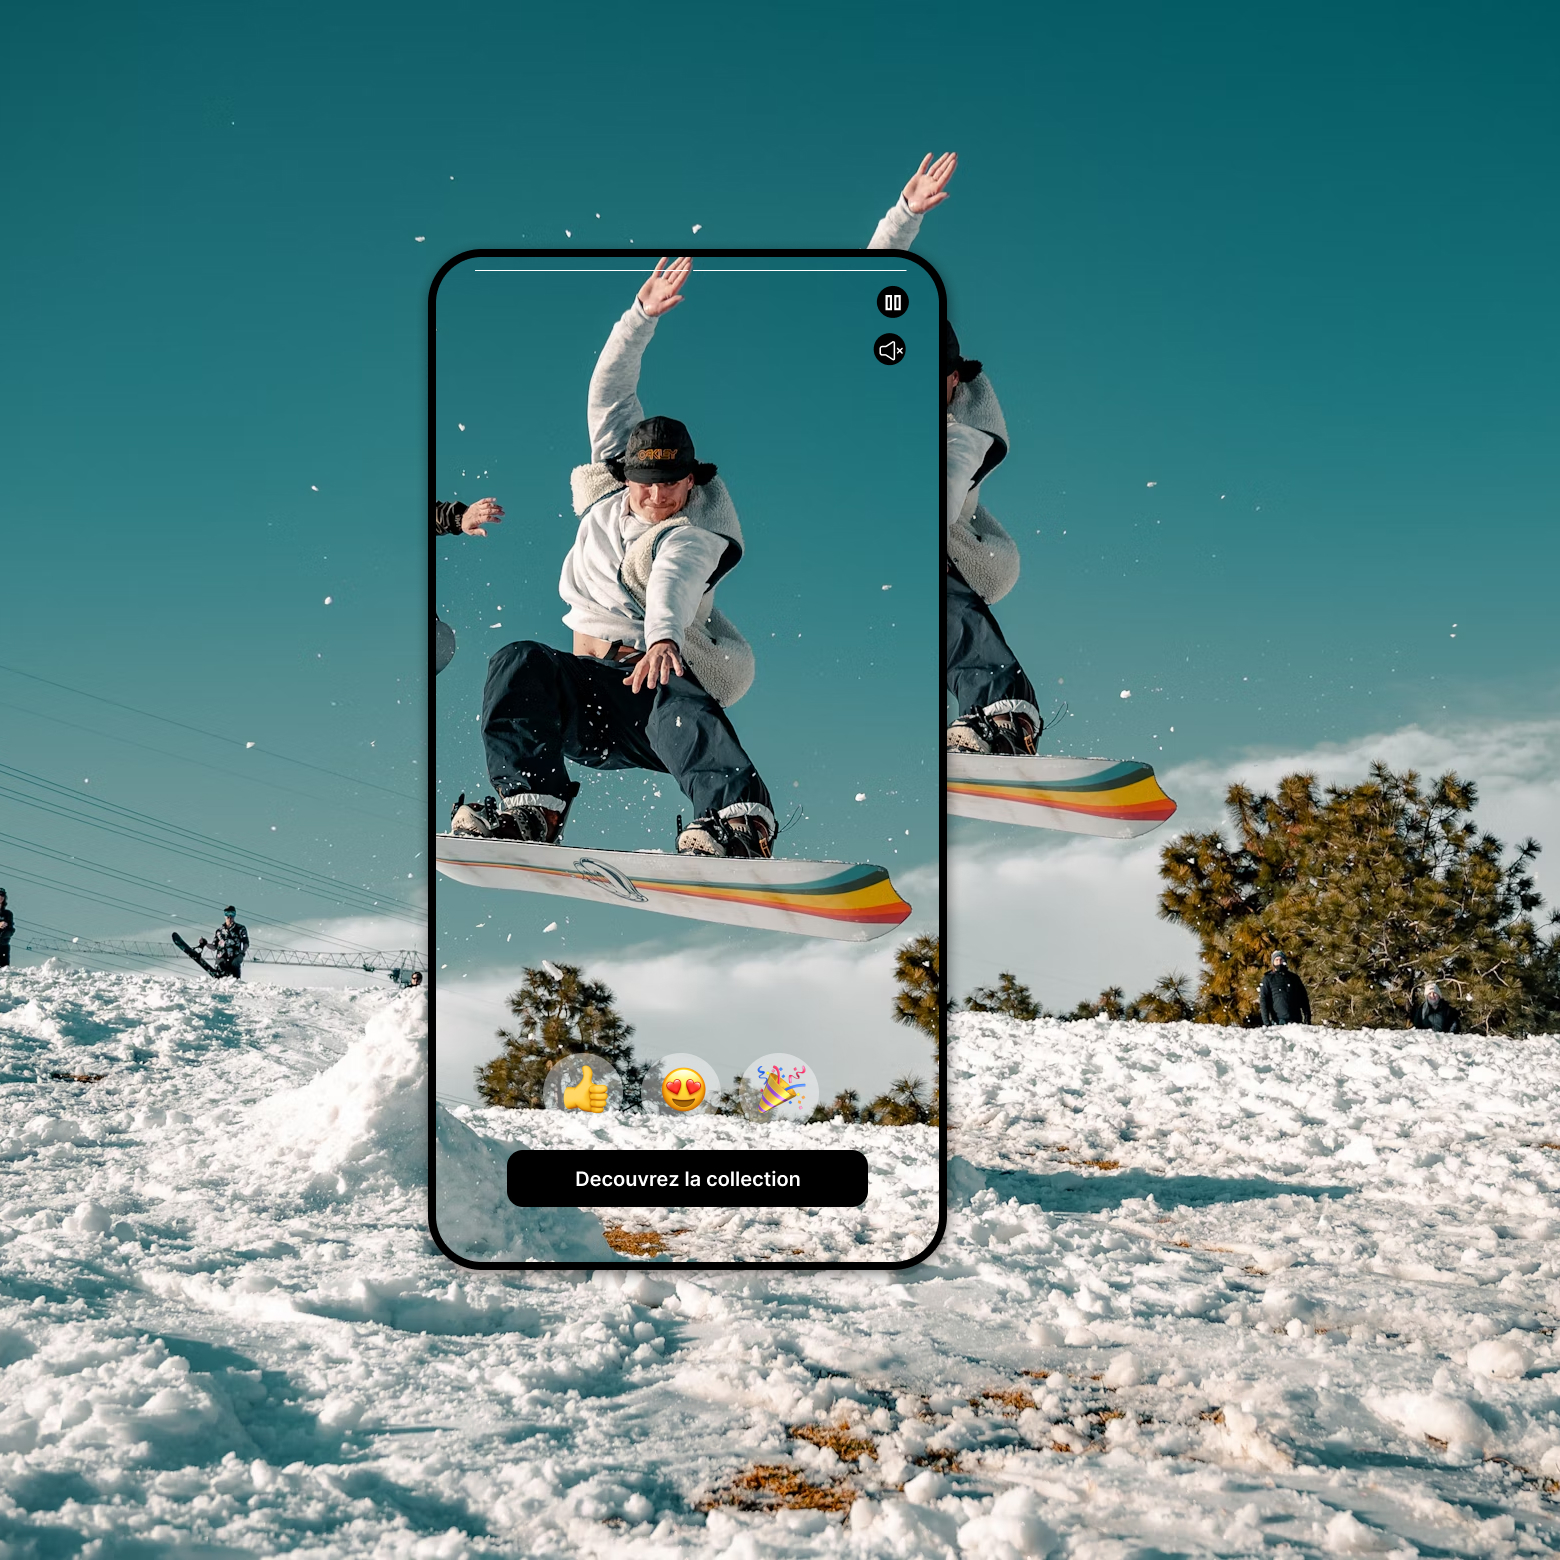
4 ️ ※ Configure Call-to-Actions
Your call-to-actions will allow your visitors to perform actions that you have predefined and thus engage them and promote their conversion.
Videopop offers 6 call-to-actions (CTAs). Each has its own customization options that appear when you select them.
To add a CTA to your video, simply click on its icon in the CTA column.
CTA Message
This CTA allows you to display a message superimposed on your Videopop and to add a link to it.
CTA pimple
Add a button superimposed on your video and customize it to fit the design of your site. This button acts as a link.
CTA Product
When your Videopop is displayed on one of your product pages, a mini sheet will automatically be added containing the thumbnail of your product, its title, its price and an add to cart button.
CTA Question
This CTA allows you to ask your audience a closed question in the form of a survey. As soon as your visitor opts for one or other of your answers, the percentages of responses are displayed as well as an action button.
CTA Code
The CTA Code allows you to highlight a promotion on your video.
Like & Emojis
As on many social networks, you can add your emojis to interact with your visitors.
5 ️ ※ Customize the display of your Videopop
VideoPop offers 3 display modes to adapt to your design.
Mode Theater
Immersive cinema mode
- The video is broadcast in the center of the screen with an overlay from a desktop and in full screen from a mobile
Inline mode
Integrated into the heart of your page
- The video is inserted in the location you have previously defined
- Maintain the design of your site
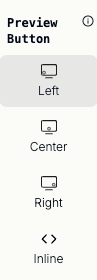
Left/Right mode
Side floating popup
- Video in a fixed position on the side
- Does not interfere with navigation
- Always visible while scrolling
6 ️ ※ Customize the preview
The preview is the dot that appears first on your pages and that encourages your visitors to view your videopop.
4 possible display options: At the bottom left (Left), at the bottom center (Center), at the bottom right (Left), or a predefined location (Inline)
A personalization context column appears when you select a display mode. It allows you to influence the design of the preview: its size, its shape, an animation option and a subtitle.
Here are various design examples:
7 ️ ※ Set up audiences
The design of your Videopop is now configured.
This last step will allow you to precisely control where to make it appear on your site.
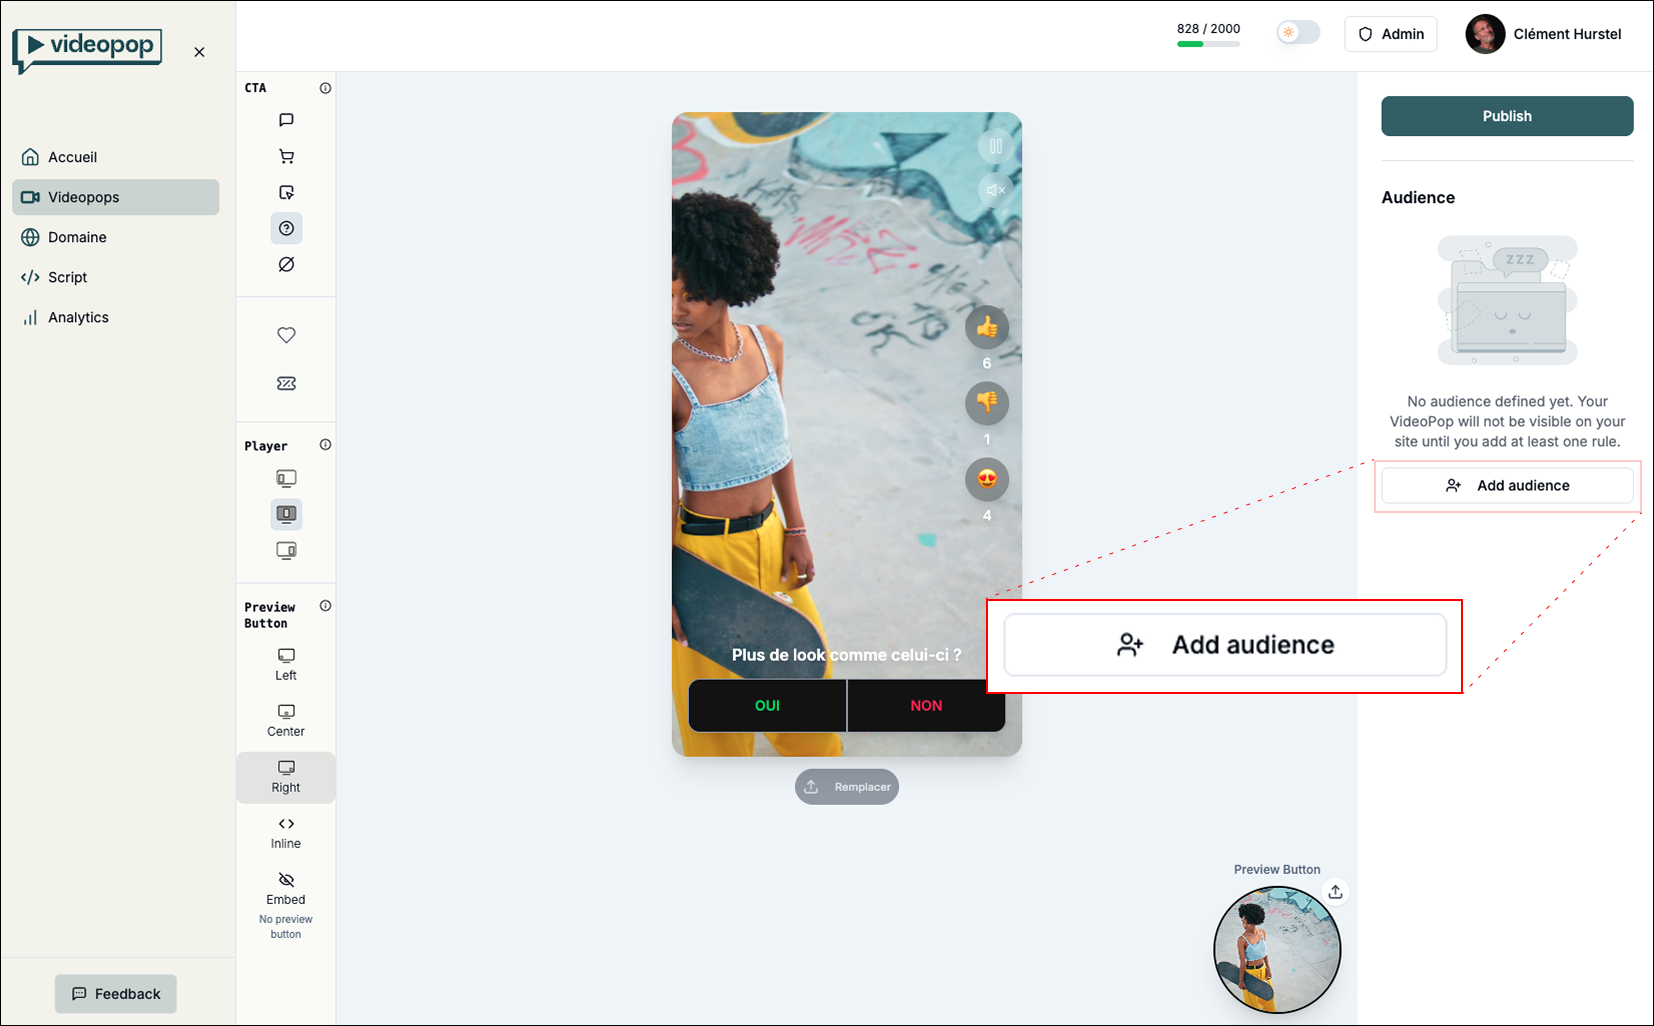
To do this, you will add an audience to your Videopop by clicking on the “Add audience” button on the right of your screen to define the display rules for your videopop.

The display of a videopop is defined according to the URL where you choose to have it appear. This dialog box helps you define rules such as:
Show when the URL contains “category”, or starts with mysite.com/shoes, does not contain “shoes” or is exactly mysite.com/shoes/sneakers-blue
- You can add multiple rules to define an audience.
- Cumulating the rules, they must all apply for your videopop to be displayed.
8 ️ 8.3 Publish
You can publish your Videopop. It will take a few minutes for your video to be processed and your Videopop broadcast.
Your audience will now be able to interact with it according to the configuration you have adopted.
- Find all your videopops in the “Videopops” section.
- Keep an overview of the main activity indicators of your Videopops.
- Analyze your results in order to optimize your E-commerce Video strategy.